Below is a quick tour of everyday features of Spaces

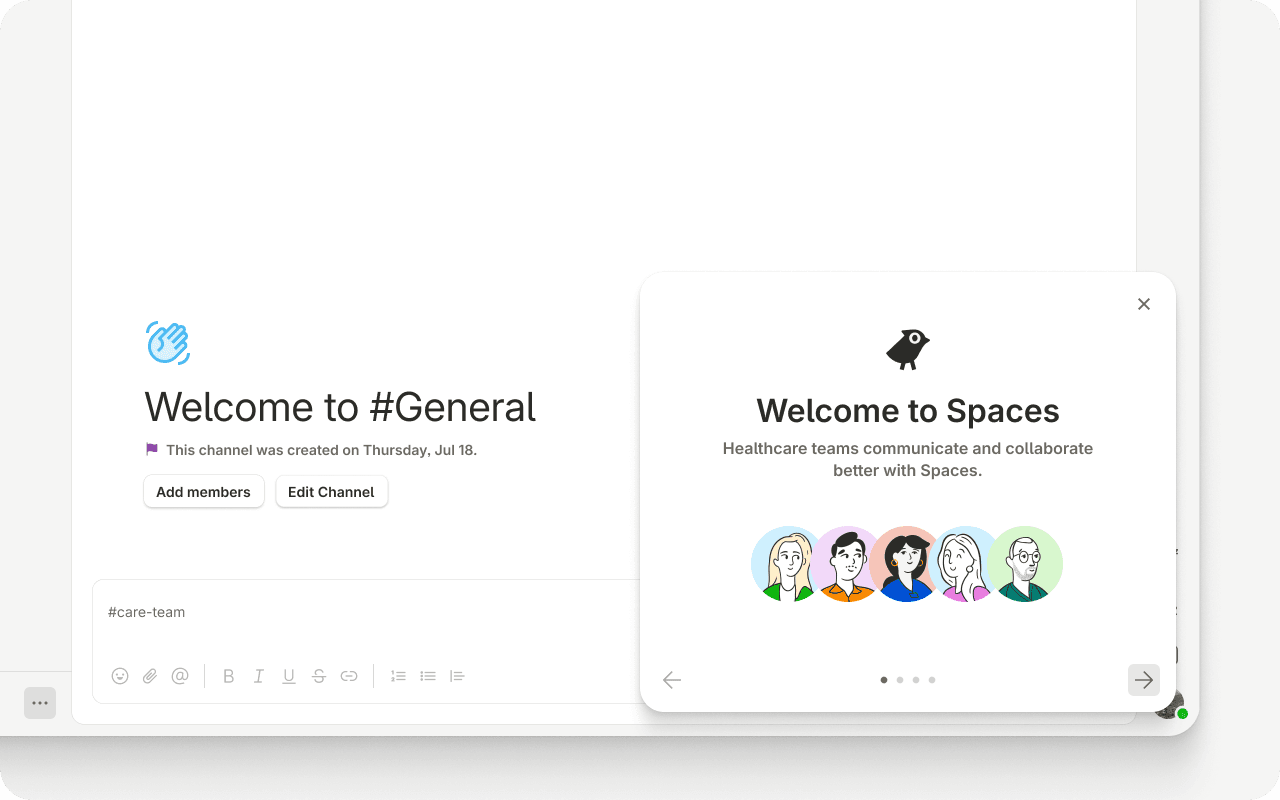
Getting Started: What You’ll See First
To get started, you should receive an email invitation from your Spaces Admin. Simply click on the Go to Spaces button and follow the prompts to quickly set up your profile.
Spaces is organized into your Organization → Spaces (workspaces for teams, departments, or partners) → Channels (topic-based conversations). Threads, replies, and direct messages keep things focused and secure.
When you first sign in, your Organization Owner may have already set up default Spaces and channels so you can jump in right away.
Invite Teammates (For Admins)
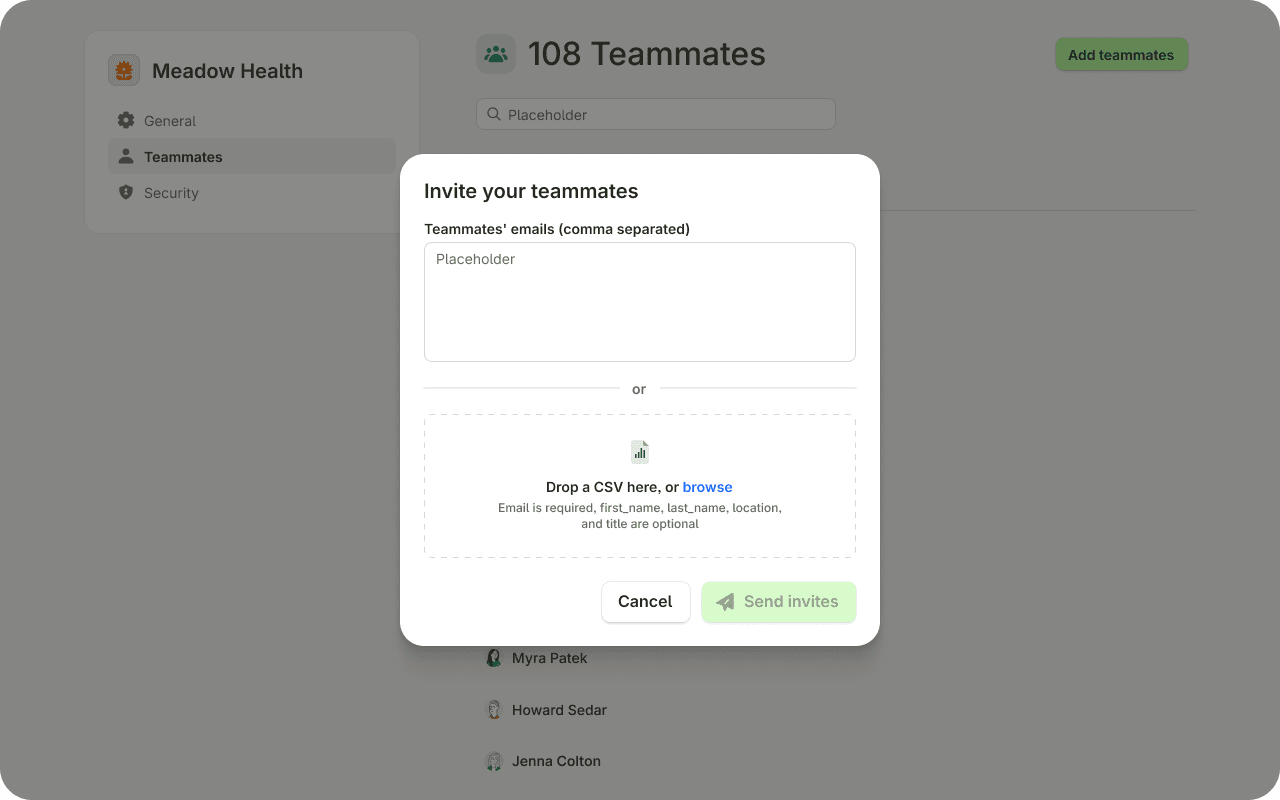
New people must first be invited to your Organization (only then can they be added to individual Spaces). Org Owners invite members and manage security from organization settings. Click on your Organization Name at the top left-panel to pull up your Org settings, and click ‘Teammates’.
Add Teammates: Invite users that are part of your organization
Invite Guests: Invite users that are not part of your organization (such as partner organization users) but you want access to specific DMs, Spaces, or Channels in your organization.
Tip: You can either invite a handful of users by typing in your teammate’s emails, or use the bulk load function by dropping in a csv file your teammates’ email, first name, and last name.
Making Spaces your own
Create a Space
Think of Spaces as rooms for departments, teams, or external collaborators (e.g., “Accounting”, “Human Resources”, “Arlington”, or “Modern Health Clinic”):
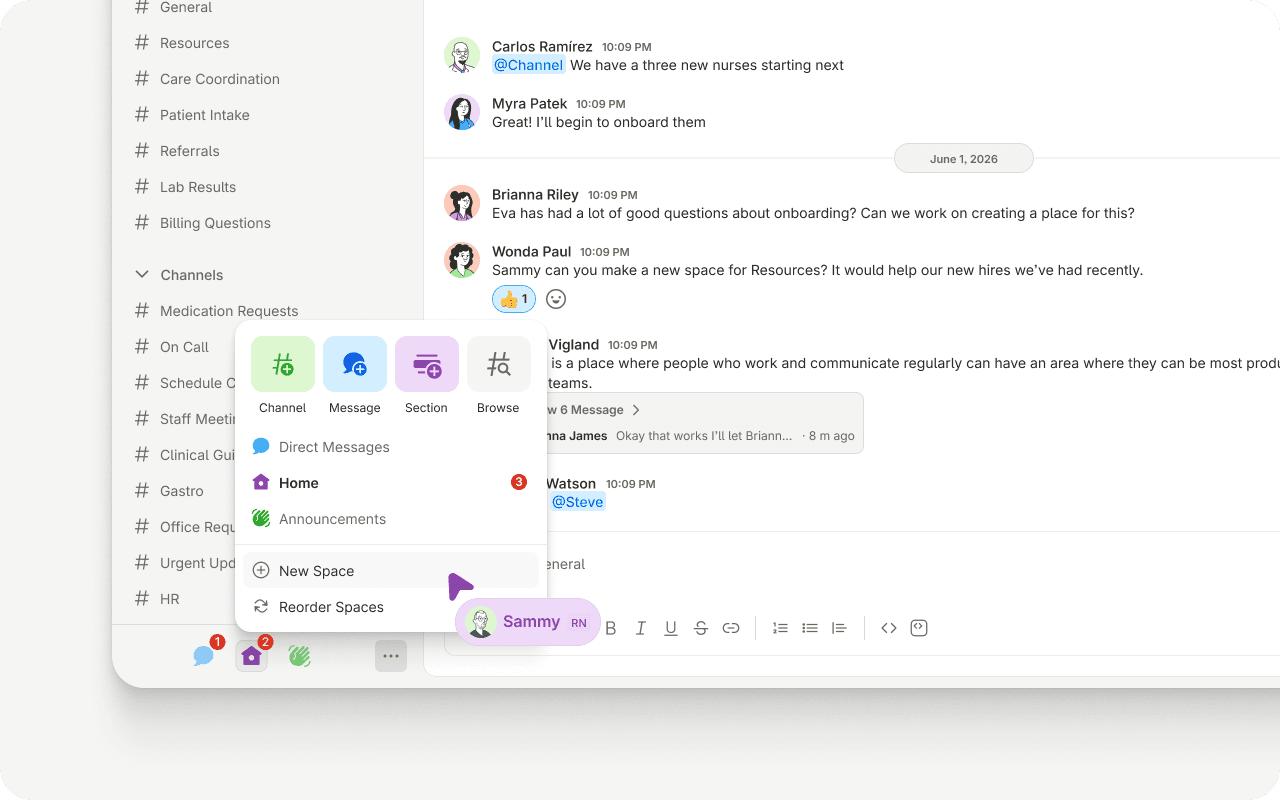
Click the three-dot menu (…) in the bottom-left corner and select “New Space.”
Give it a clear name, choose an icon, and optionally add a purpose (e.g., “Waverly Location”).
You automatically become the Space Owner, with full control to manage the space and its members, including who can browse and create channels.
Managing memberships: Hover over the space name and click the cog wheel (⚙️) → Members tab → “Add Members,” then search and select. Note that you can only add people who are already in your organization. Space Owners and Administrators (and Org Owners) manage memberships; in the Details tab you can also make a space mandatory or enable auto-membership for all org members.
Create a Channel
Channels live inside a Space and group conversations by team, topic, or workflow. Who can create channels is set per-space (Everyone; everyone except guests/connected users; just Owners & Admins; or specific users) in the space’s Settings tab.
To create a channel, click on the ‘+’ button that appears when you hover over your Space name in the left-hand panel. You can also click on the ellipsis on the bottom of the left-panel and select the ‘Channel’ button.
Managing memberships: Channel Owners and Administrators manage a channel’s members and settings; Moderators can add or remove members and assign channel roles without changing settings or archiving.
Create a Direct Message (DM)
DMs are private 1:1 or small-group conversations that live outside channels — ideal for quick questions or sensitive topics. You can DM anyone in your organization, or someone in a connected organization if direct messaging is enabled. In a DM you can share files and links, @mention people, and reply to messages.
You can navigate to your DMs by clicking on the chat bubble icon on the bottom of your left-hand panel. If a teammate is not already showing up in your DMs, you can start a direct conversation by clicking on the left-hand panel ellipsis, select ‘Messages’, and type in your teammates name/email.
Sections
Use “Sections” to organize your sidebar of spaces or DMs and Space Channels into custom groups. To create a section (either from your DM view or from any of your Spaces), click the ellipsis on the left-hand bottom panel and select ‘Section’. Give a name for your section and start dragging your DMs or Channels into your preferred Section grouping.
Working with Messages
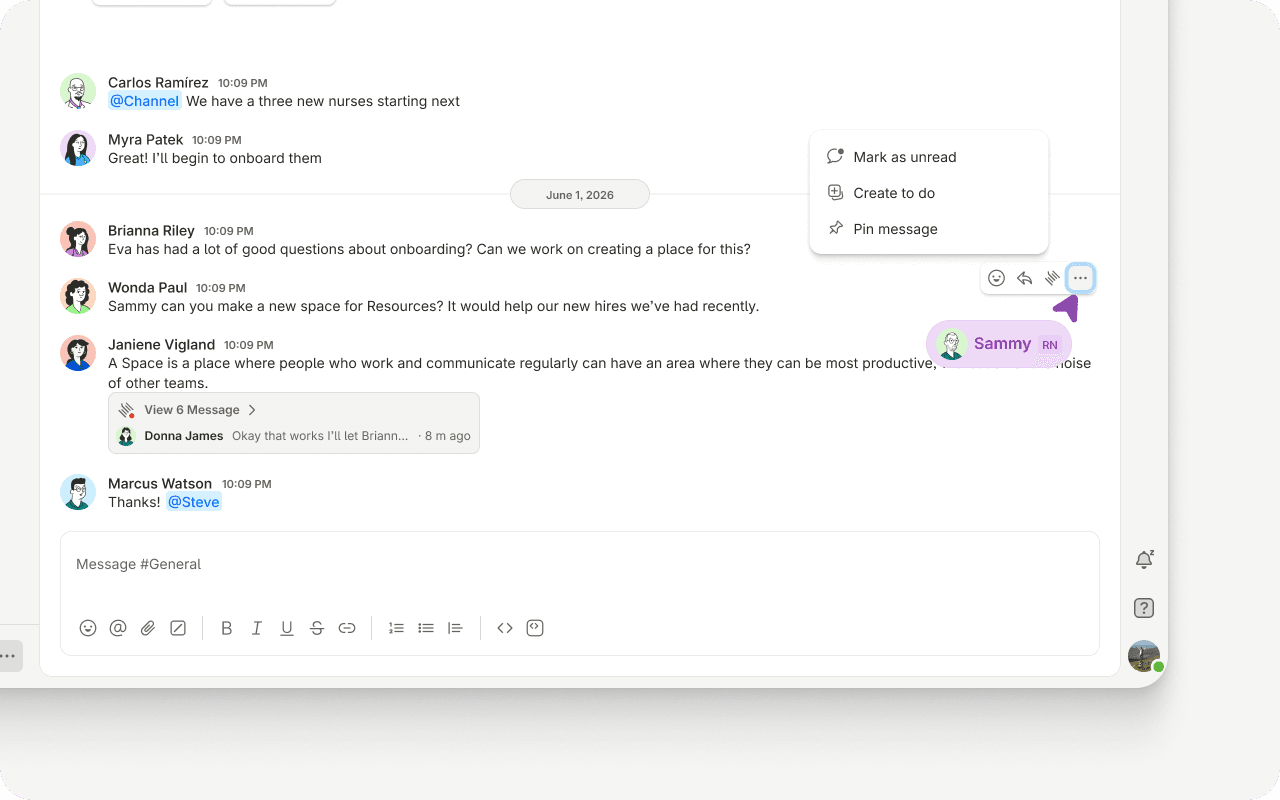
Hovering over a message allows you to:
Send a reaction emoji to a message
Reply directly to a message
Start a thread (i.e., a side conversation)
Edit your message
Delete your message
Mark a message as unread
Pin a message
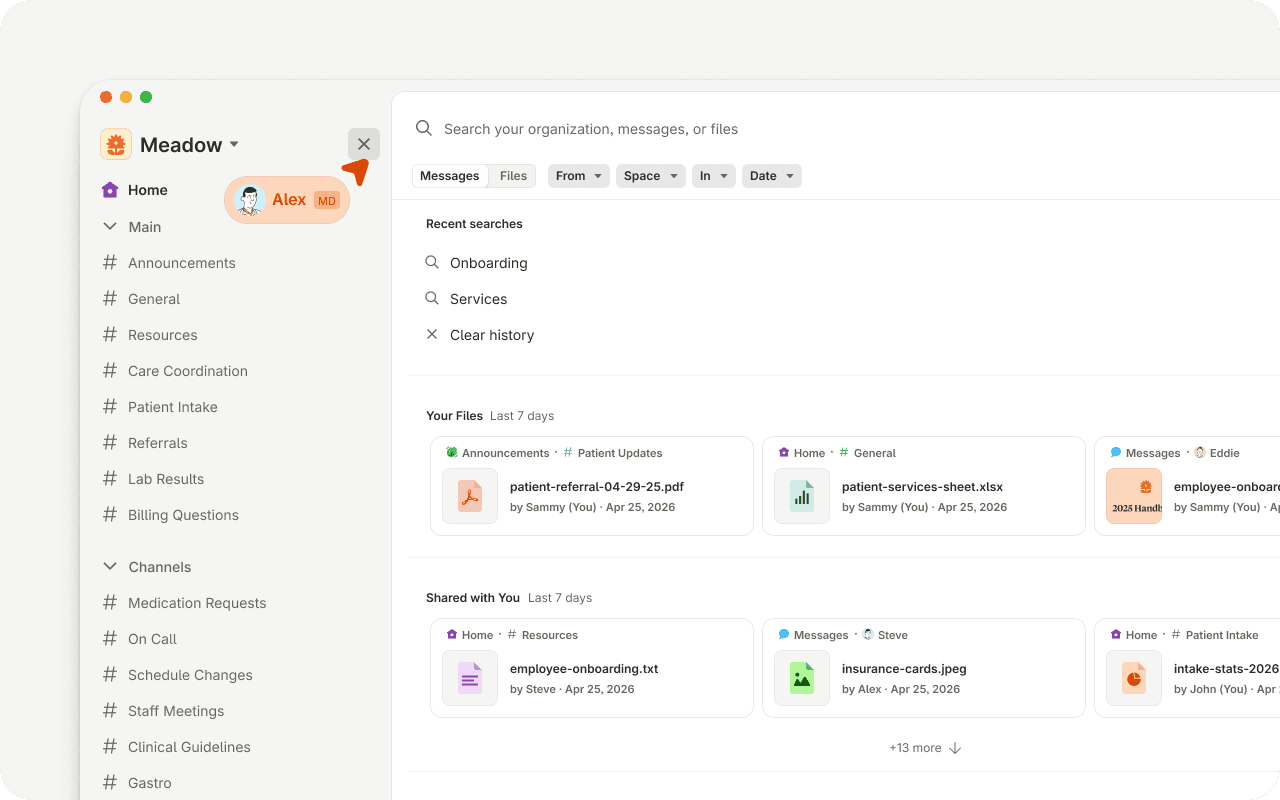
Search
You can search for keywords or files in your Organization by using the Search feature found on the left-hand panel, right next to your Organization name
Configure Your Organization’s Security
Spaces supports multiple secure login methods that can be governed by your organization’s security policy:
Passwords, with self-service reset via “Forgot password?” on the login screen.
Multi-Factor Authentication (MFA) — recommended; if enabled for your org, you’re prompted to set it up after first login.
Biometric login (Face ID / fingerprint) on supported mobile devices.
Org Owners manage organization security settings. Some login methods may be restricted by your org’s policy.
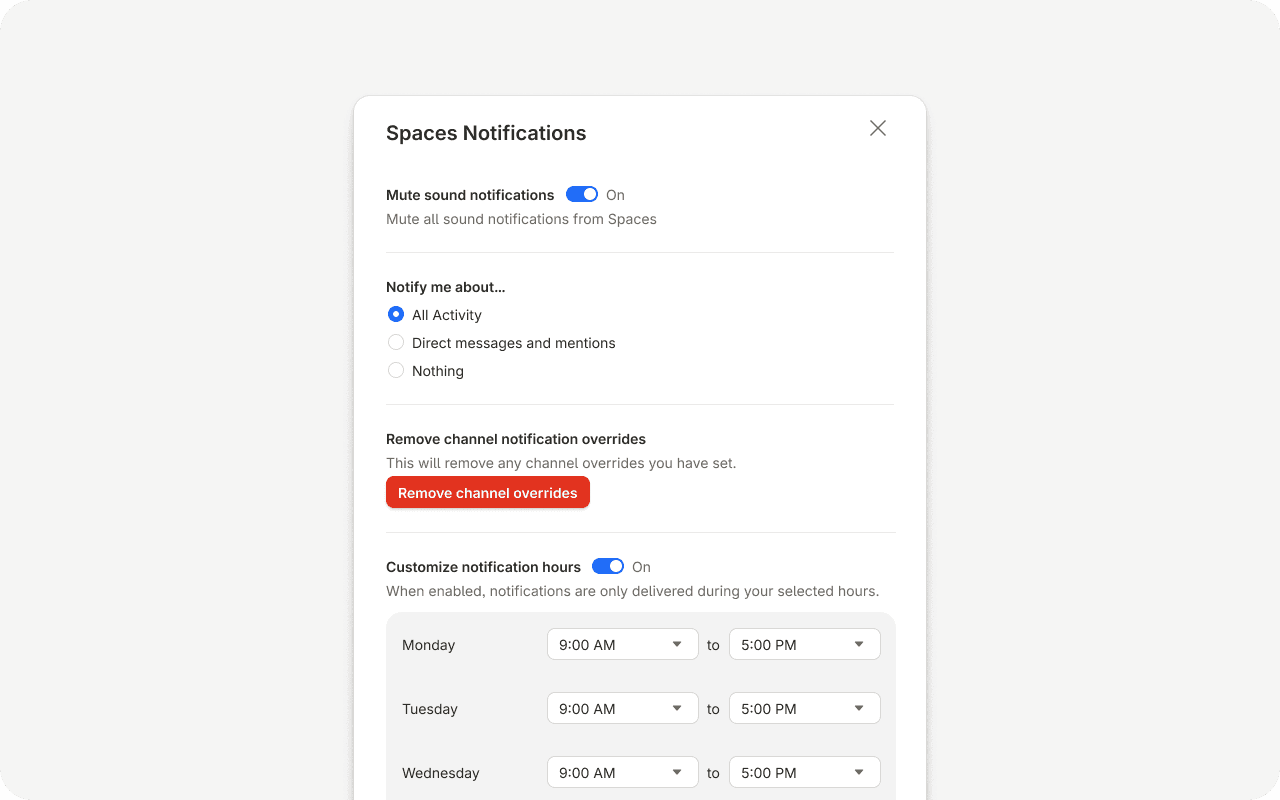
Manage Your Notifications
Customize alerts at two levels so you stay informed without the noise:
Snooze Notifications (quiet window or snooze for 20 min / 1 / 4 / 8 hrs) immediately by clicking on the Bell icon on the right-side panel and making a selection
Edit Notifications at the DM or Channel-level: Right-click on a DM or Channel where you can select a specific notification setting
Customize Notifications - click on the Bell icon on the right-side panel and select Spacesnotifications. You can further customize your notifications here, including setting times during the week where you can receive notifications.
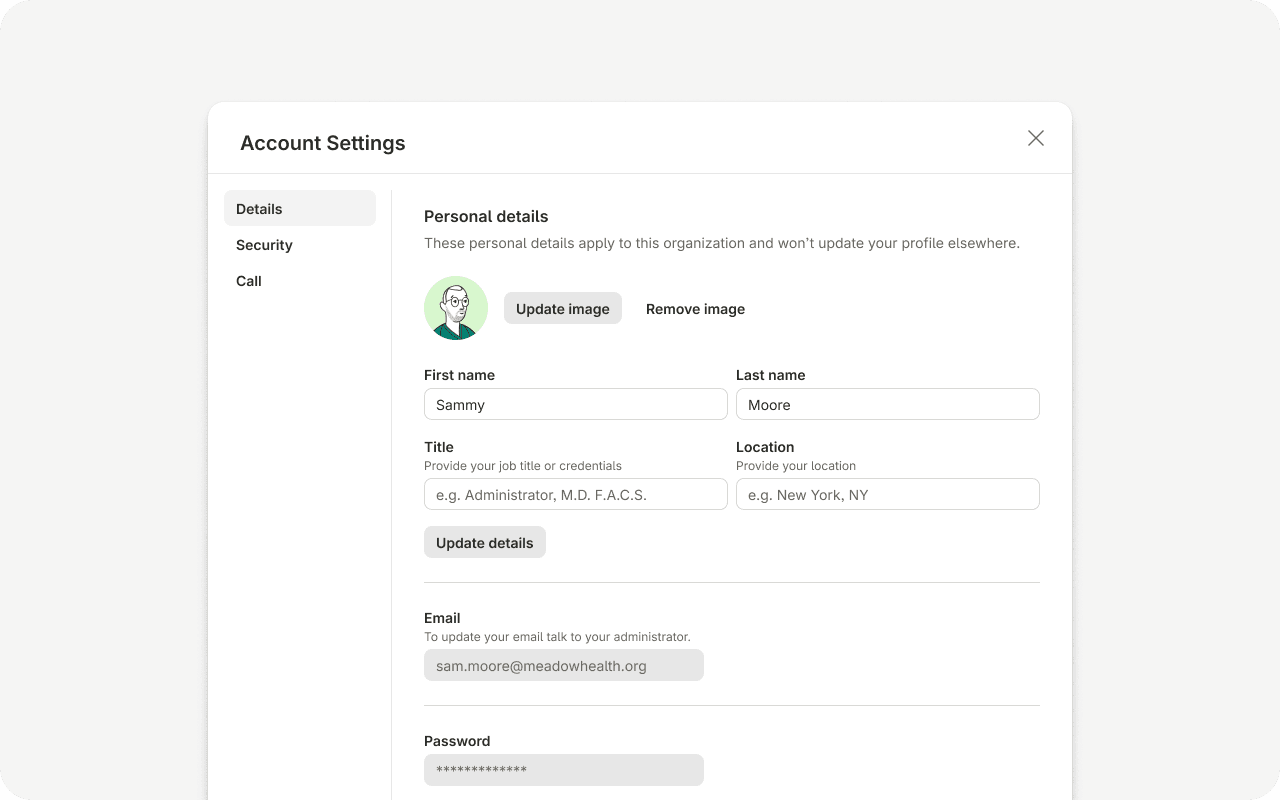
Account Settings
Manage your personal details, preferences, and security from Settings (desktop/web: profile menu → Settings; mobile: avatar → Settings). This is also where notification preferences and biometric login options live.
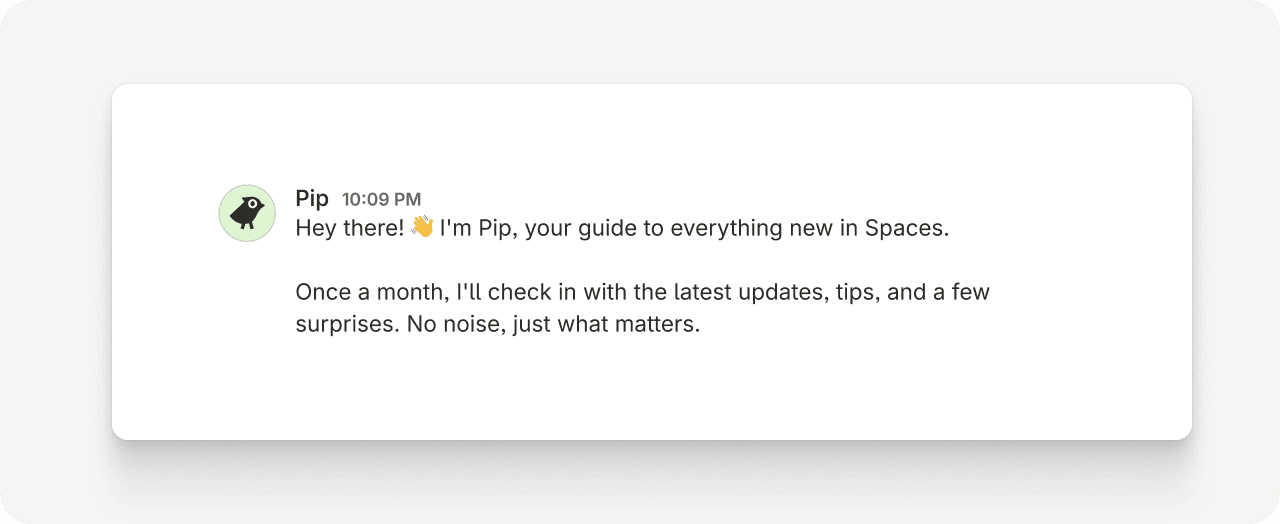
Pip Channel (What’s New?)
Make sure to visit Pip every so often on your Direct Messages panel to check out the newest features we added to the app.
Need Help?
Questions or stuck on something? Reach our support team anytime at support@chat.space. You can also browse the full documentation at chat.space/docs.